create database diagram
Create a database diagram with one click. View all your table relationships and print your diagram for reference or planning.
Access has an inbuilt feature that displays the tables and their relationships. This can be used to print out for reference or planning purposes.
Actually, it's the same feature that allows you to create a relationship.
Here's how to create a database diagram

Launch the Relationships Window
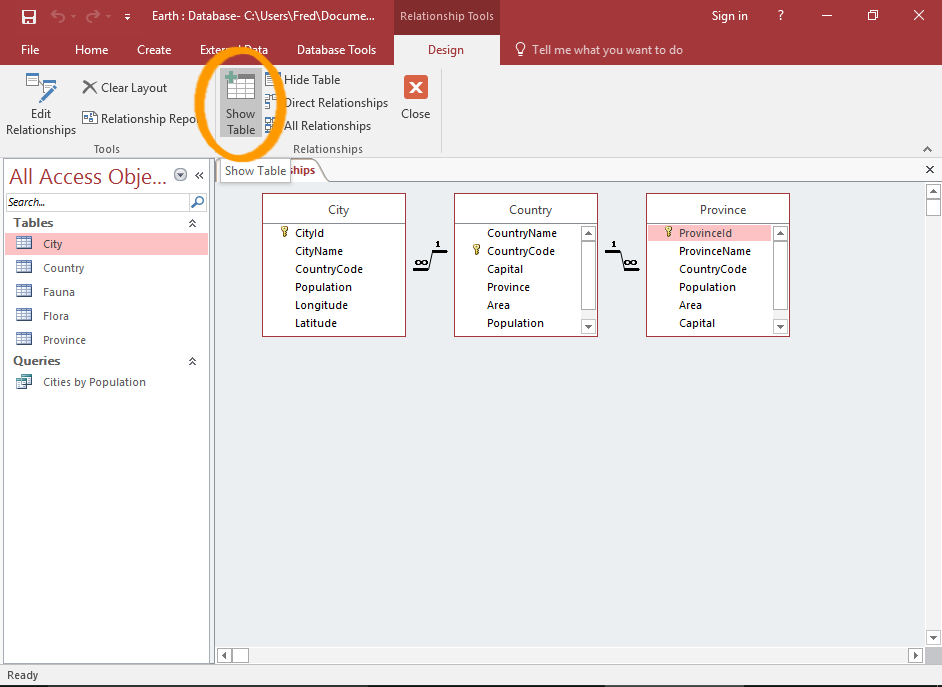
Click Relationships from the Database Tools tab in the Ribbon.
This launches the Relationships window, with a diagram of all relationships.
Show any Queries and/or Orphan Tables
By default, Access only displays objects that are in a relationship. However, you can view all tables and queries to see if any are missing from the diagram.
To do this, click the Show Table button on the Ribbon (from the Design tab) to launch the Show Tables dialog box
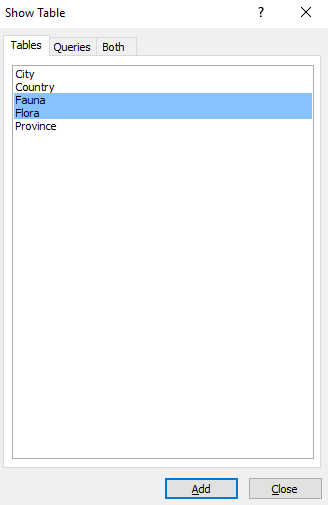
Add the Objects
Select any objects you'd like to add to the diagram and click Add.
Click Close once you're done
Rearrange the Objects if Required
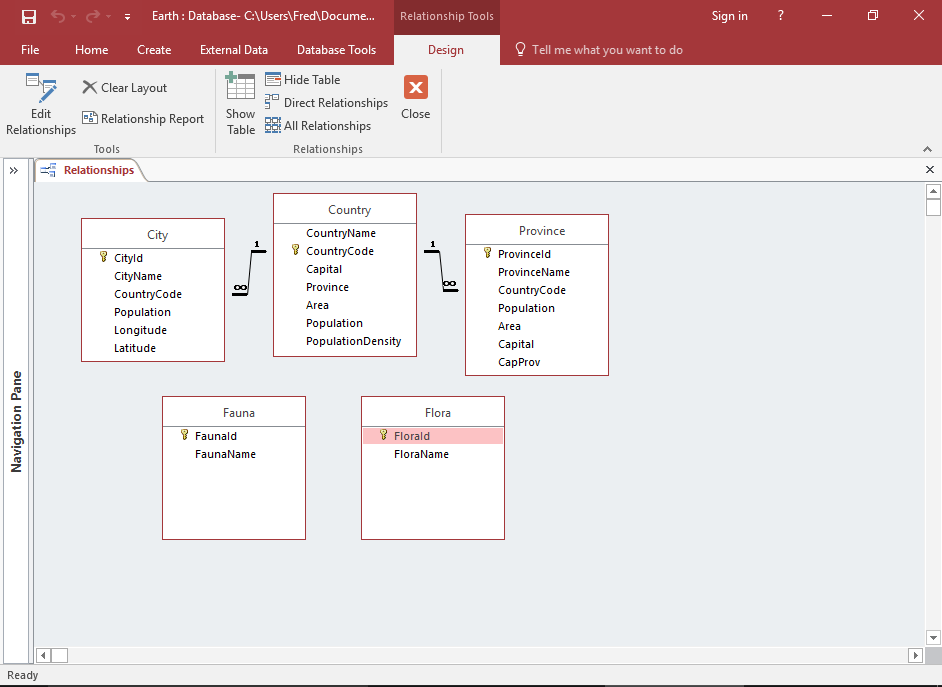
You can click and drag the objects around the window to provide a clearer picture of the objects and their relationship with each other.
You can also expand the objects' heights by clicking and dragging on their bottom edge (i.e. to display all fields without having to scroll).
Collapse the left Navigation Pane to provide more room for the diagram.
To do this, click the little « icon at the top of the pane.
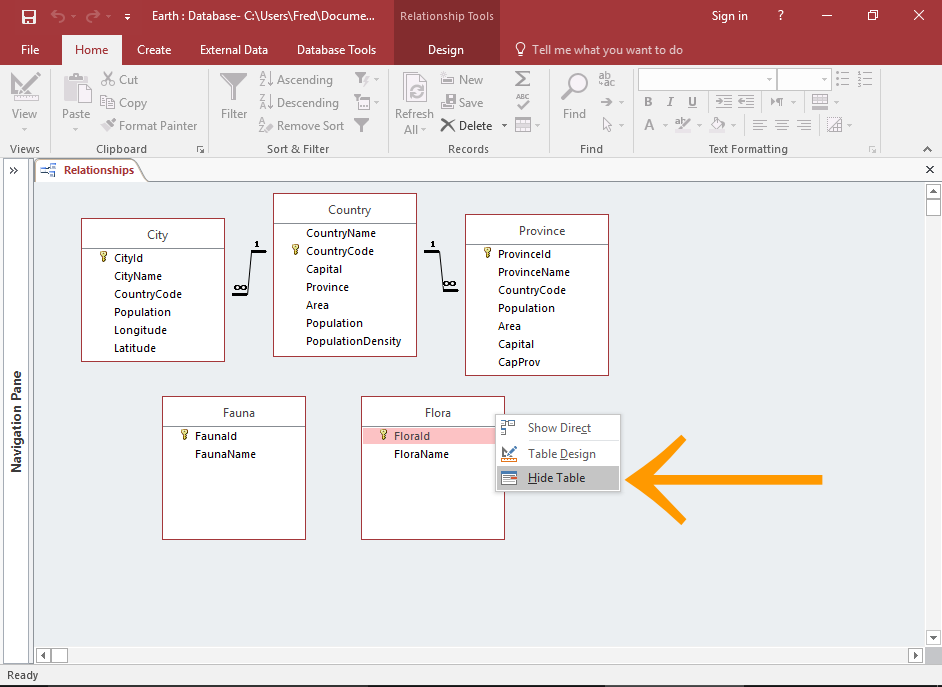
Removing Tables/Queries
To remove an object from the diagram, right-click on the object and select Hide Table from the contextual menu

Save the Layout
Once you've got the diagram looking just the way you want it, you can save the layout so that whenever you open up the Relationships Window in the future, the objects will be arranged in the way you've just arranged them.
To do this, right-click in the Diagram Pane and click Save Layout from the contextual menu
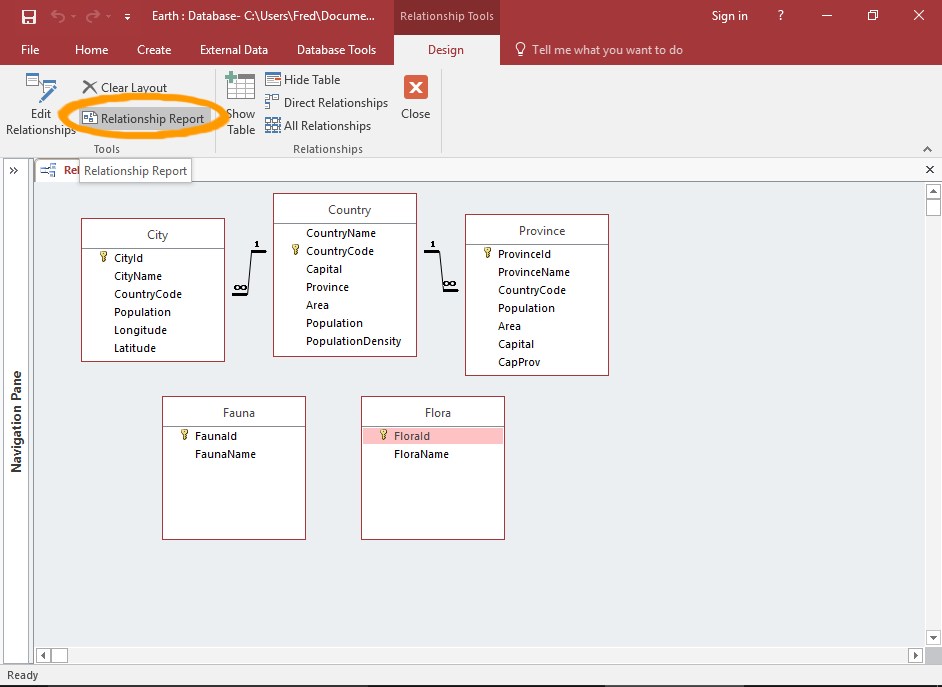
Run a Report
Access can automatically generate a report based on your diagram.
To generate a report, simply click Relationship Report on the Ribbon (from the Design tab).
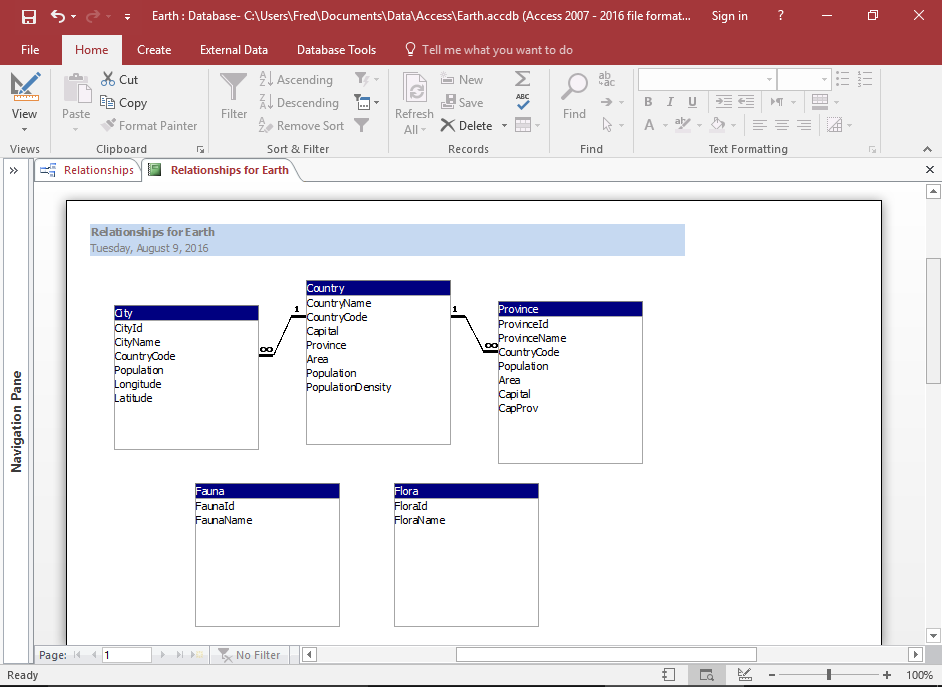
Print/Modify the Report
The report opens in Print Preview. However, just as with any report, you can switch to Design View to modify the report, save it, export it, print it etc.


Comments
Post a Comment