create an input Mask
Create an Input Mask
you can use the Input Mask Wizard to create an input mask. An input mask is a set of simple rules that specifies the format in which data can be entered into a field.
For example :- an input mask of (999) 000-0000 could be used to determine how phone numbers are entered. In this example, the area code is optional, but the rest of the number is must be entered. This is because, with any input mask, a 9 specifies an optional number, a 0 specifies a mandatory number.
Using the Input Mask Wizard
We're now going to apply an input mask to the ReleaseDate field of our Albums table. Our input mask will ensure that users enter each album's realease date in the correct format.
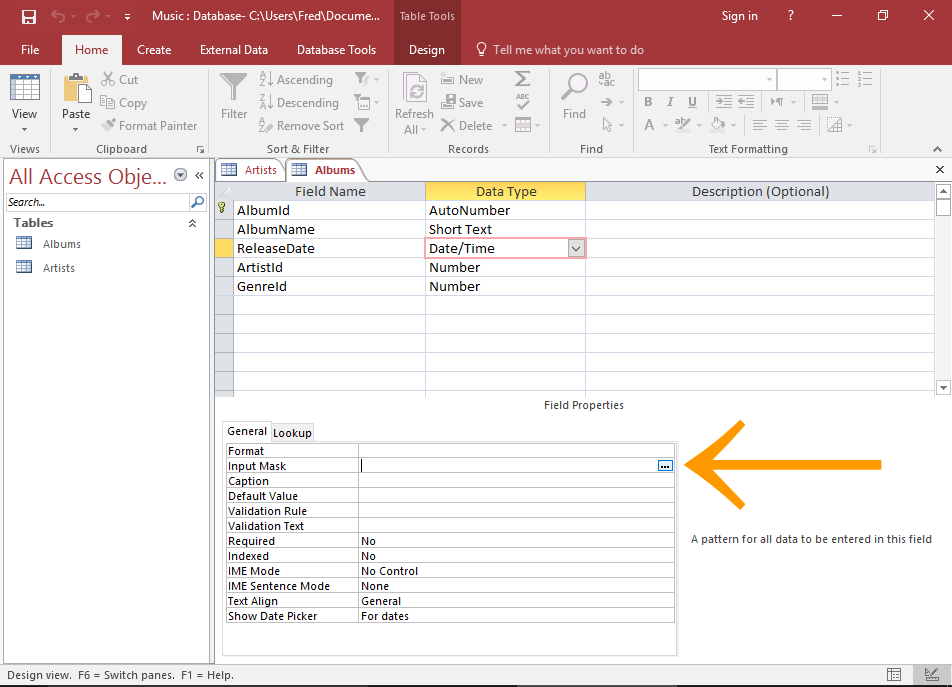
Open the Albums table and Launch the Input Mask Wizard
Open the Albums table in Design View.
Click on the ReleaseDate field then look to the bottom frame. The bottom frame displays the properties for this field.
In the bottom frame, click somewhere in the Input Mask row. A small button with three dots will appear. This button launches the Input Mask Wizard.
Click that little [...] button with the three dots
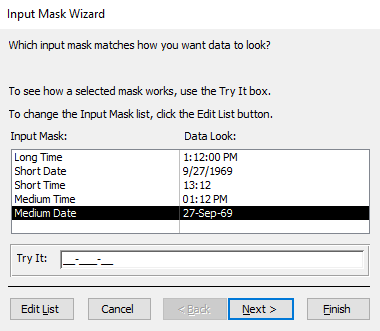
Select an Input Mask
The Input Wizard Mask presents you with some options for how you'd like the data to be entered. You can select any option and test it in the Try It field at the bottom of the wizard.
Select Medium Date and click Next >.

Customize the Input Mask
This screen allows you to make adjustments to the input mask. You can test any adjustments in the Try It field at the bottom of the wizard.
We'll make one minor adjustment.
Add two zeros, so that the input mask becomes: 99->L<LL-0000
This will ensure the user enters the date as DD-MMM-YYYY. For example, 20-Mar-2016.
Once you're happy with the input mask, click Next >.
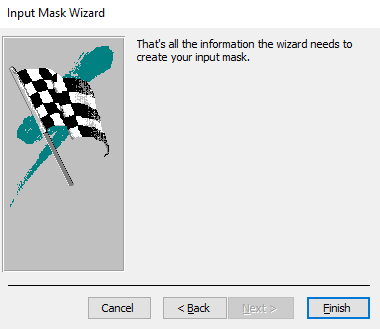
Close the Input Mask Wizard
The Input Mask Wizard will show you one last screen (and give you one last chance to go back to change your input mask).
Click Finish instead.
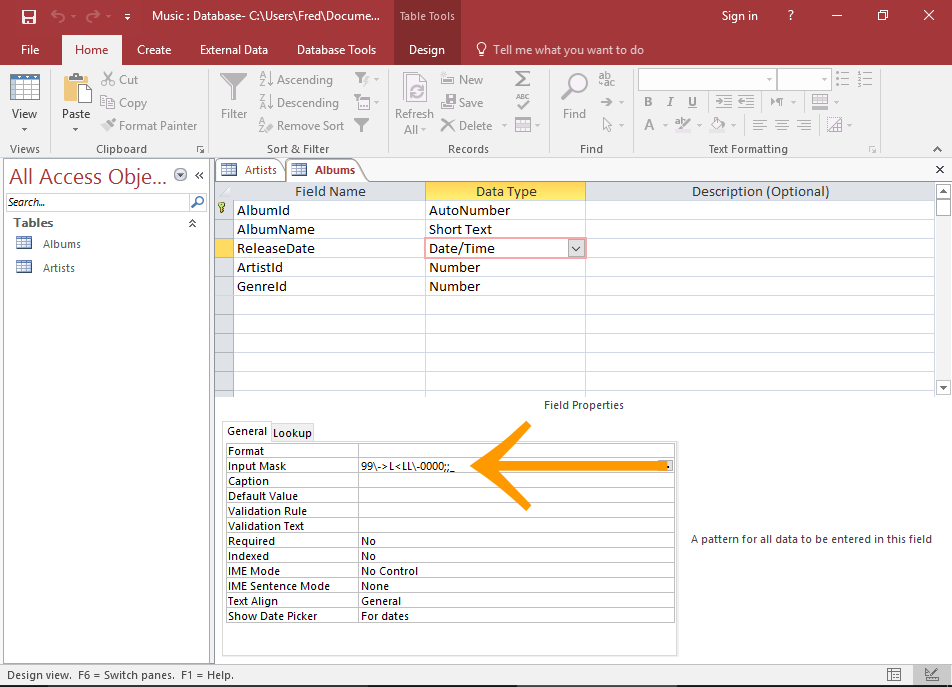
Your newly created Input Mask
Once the Input Mask Wizard closes, you'll see your newly created input mask against the Input Mask property in Design View.
Our Input Mask Explained
We just created an input mask that looks like this: 99->L<LL-0000
This specifies how the date should be entered. Here's an break down of each part:
- The 99 part defines two optional numbers (i.e. for the day). So the user has a choice of entering that part of the date. But if they do, it must be a number.
- The >L specifies that the user must enter an uppercase letter for that part of the date.
- The <LL specifies two lowercase letters for that part of the date.
- The 0000 specifies four numbers for that part of the date.


Comments
Post a Comment